Theme requirements
To use GoodHeart, you must be running WordPress 5.0 or higher, PHP 5.6 or higher, and MySQL 5 or higher. We have tested it with Mac, Windows, and Linux. Below is a list of items you should ensure your host can comply with.
Check to ensure that your web host has the minimum requirements to run WordPress.
Always make sure they are running the latest version of WordPress.
You can download the latest release of WordPress from the official WordPress website.
Always create secure passwords for FTP and Database.
Hosting is more secure when PHP applications, like WordPress, are running using your account’s username instead of the server’s default shared username (www or www-data). The most common way for hosting companies to do this is using PHP. Just ask your potential host if they run PHP or something similar.
Recommended PHP Configuration Limits
Many issues that you may run into such as white screen, demo content fails when importing, empty page content, and other similar issues are all related to low PHP configuration limits. The solution is to increase the PHP limits. You can do this on your own, or contact your web host and ask them to increase those limits to a minimum as follows:
max_execution_time 180memory_limit 256Mpost_max_size 32Mupload_max_filesize 32M
You can verify your PHP configuration limits in the System tab in the Elementor. Take a look in the left sidebar for WP Dashboard > Elementor > System info.
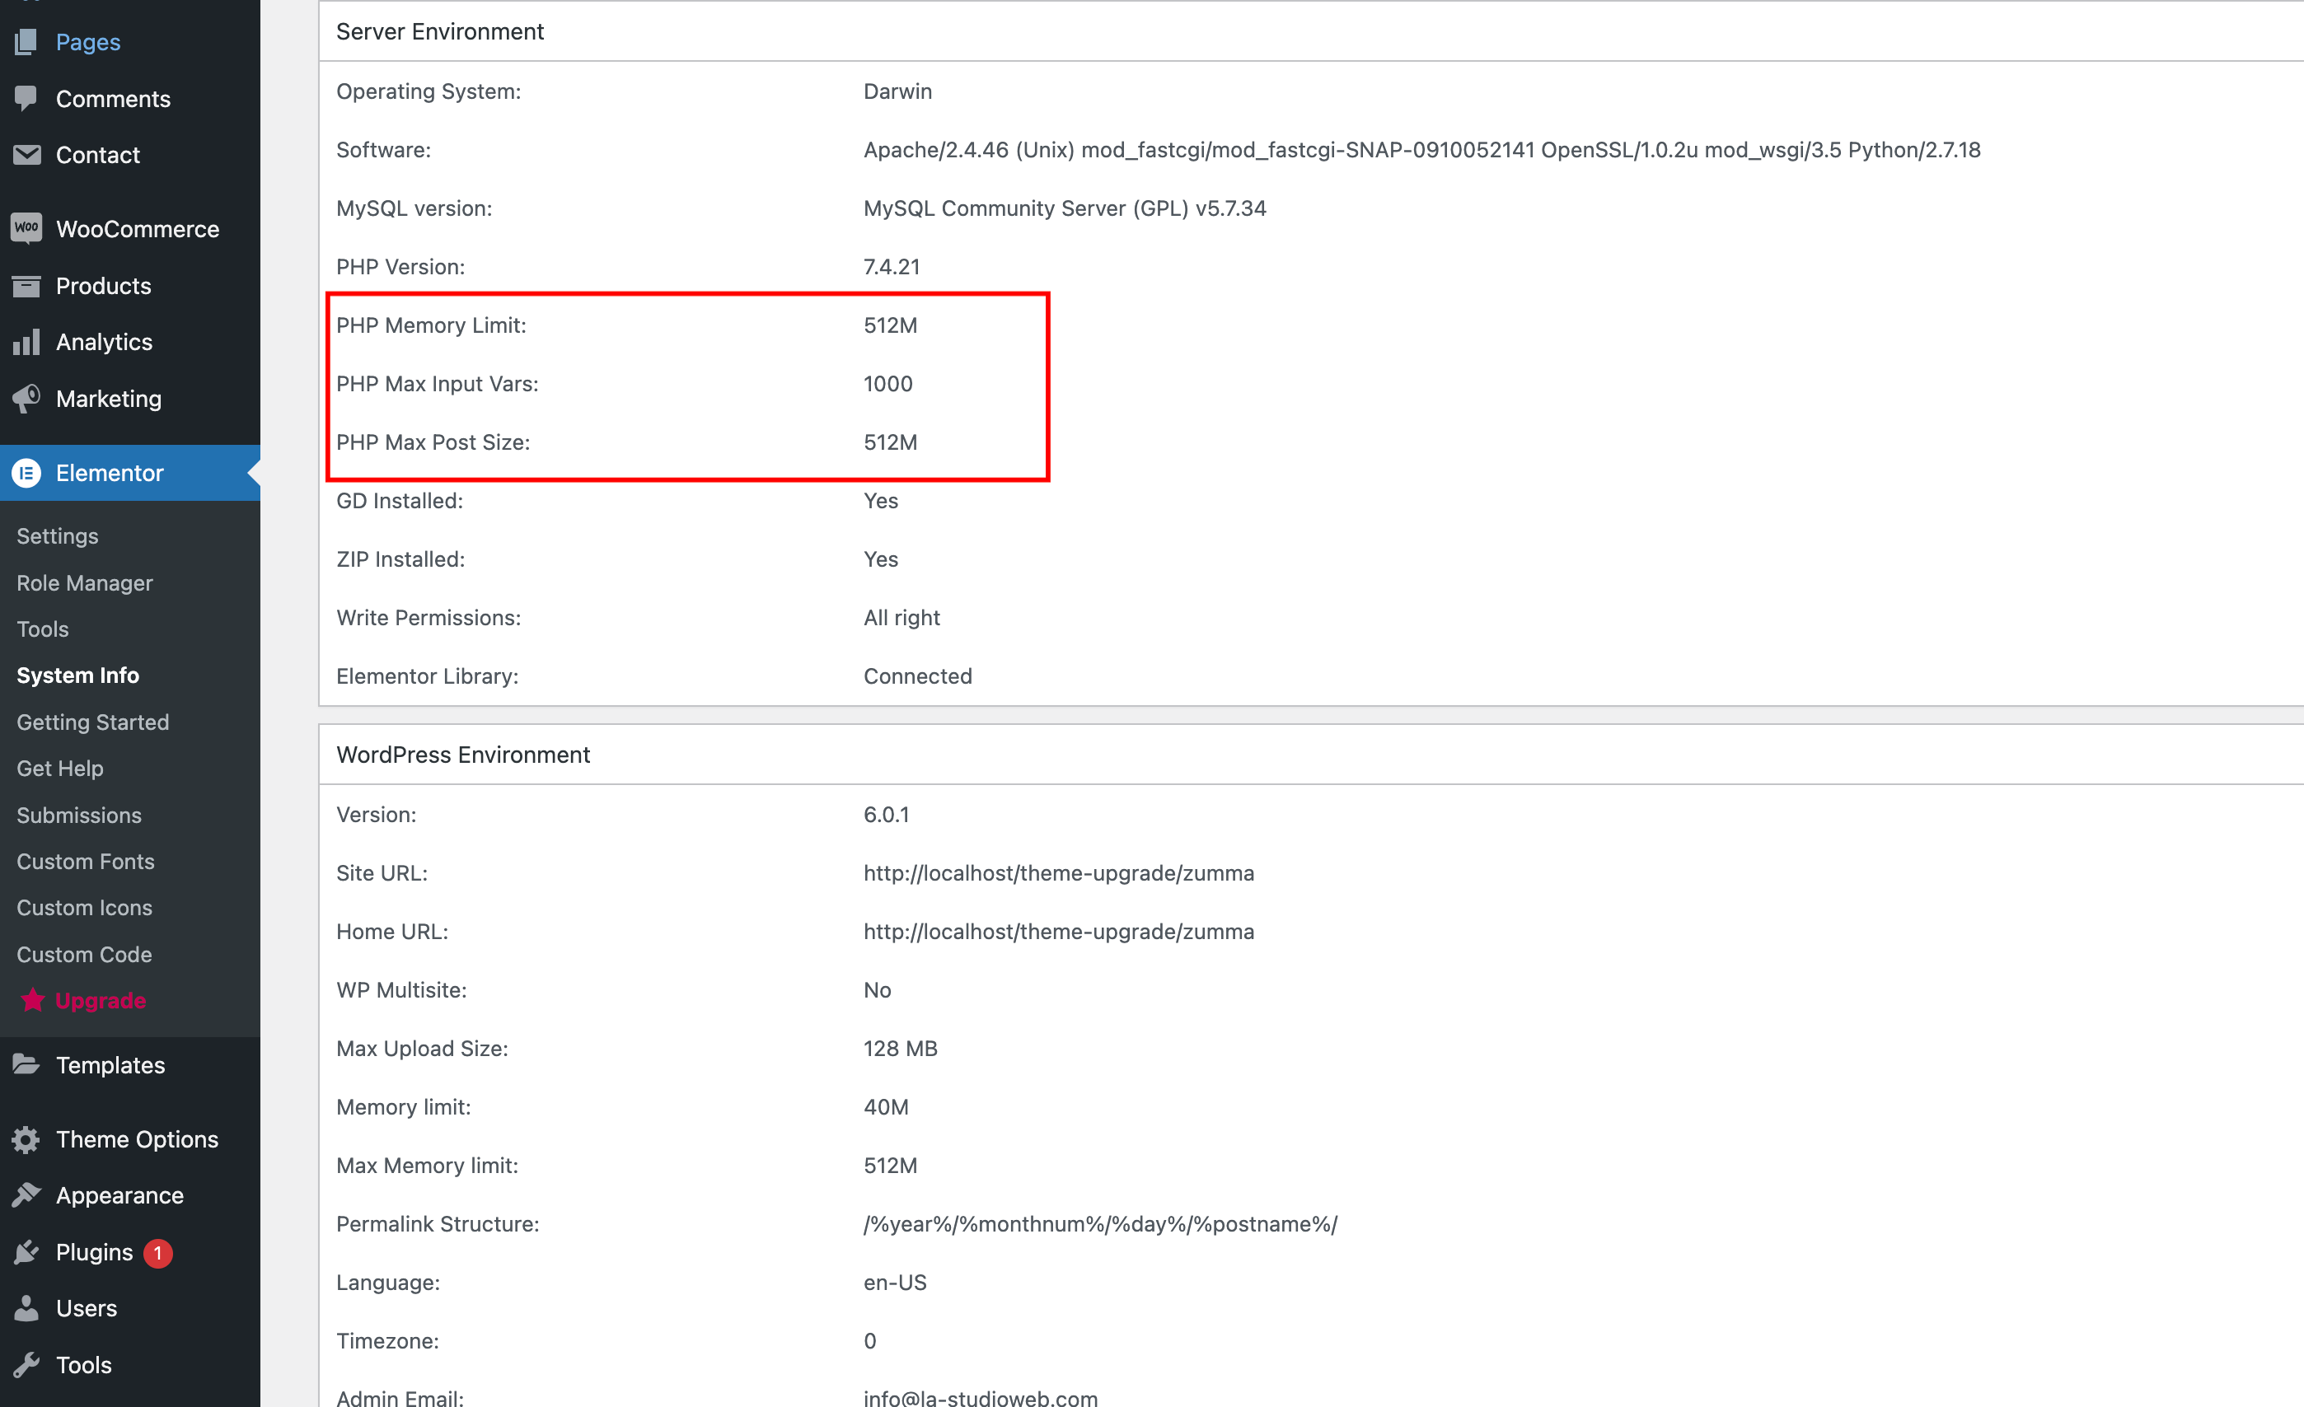
Your mission is to make those 4 sections turn from yellow to green.
Tips For This Part 👍
WP Memory Limit: find the file wp-config.php. Add the line
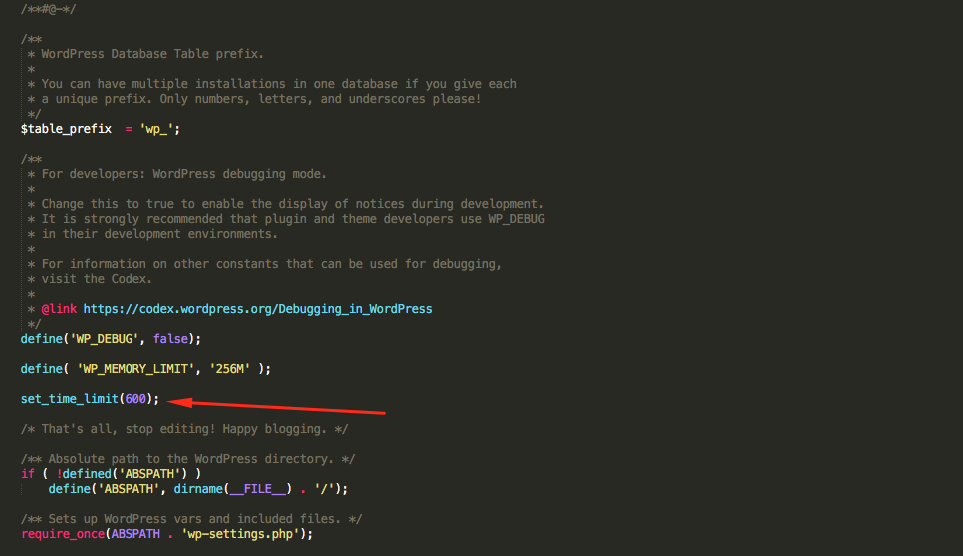
above the line /That's all, stop editing! Happy blogging./
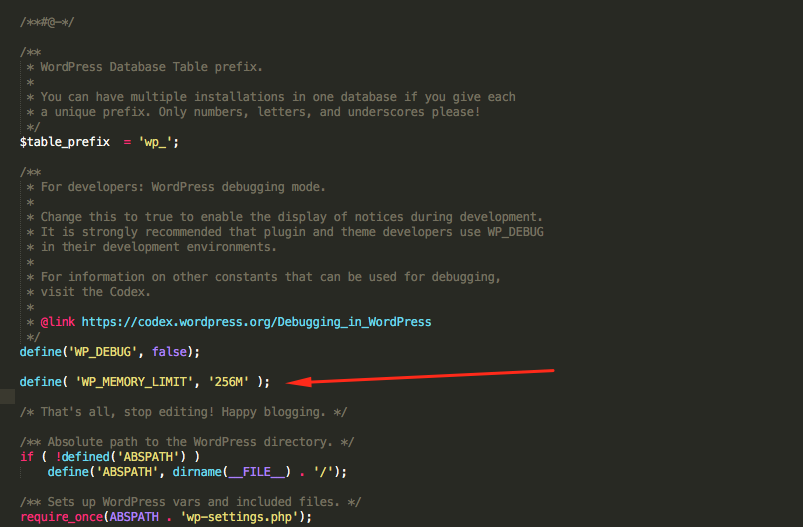
WP Debug Mode: It is not important to set WP Debug Mode then do not worry about it.
PHP Time limit: find the file wp-config.php. Add the line “set_time_limit(600);” above the line /That's all, stop editing! Happy blogging./
PHP Max Input Vars: Find .htaccess in folder Root of website. Add the line “php_value max_input_vars 5000”
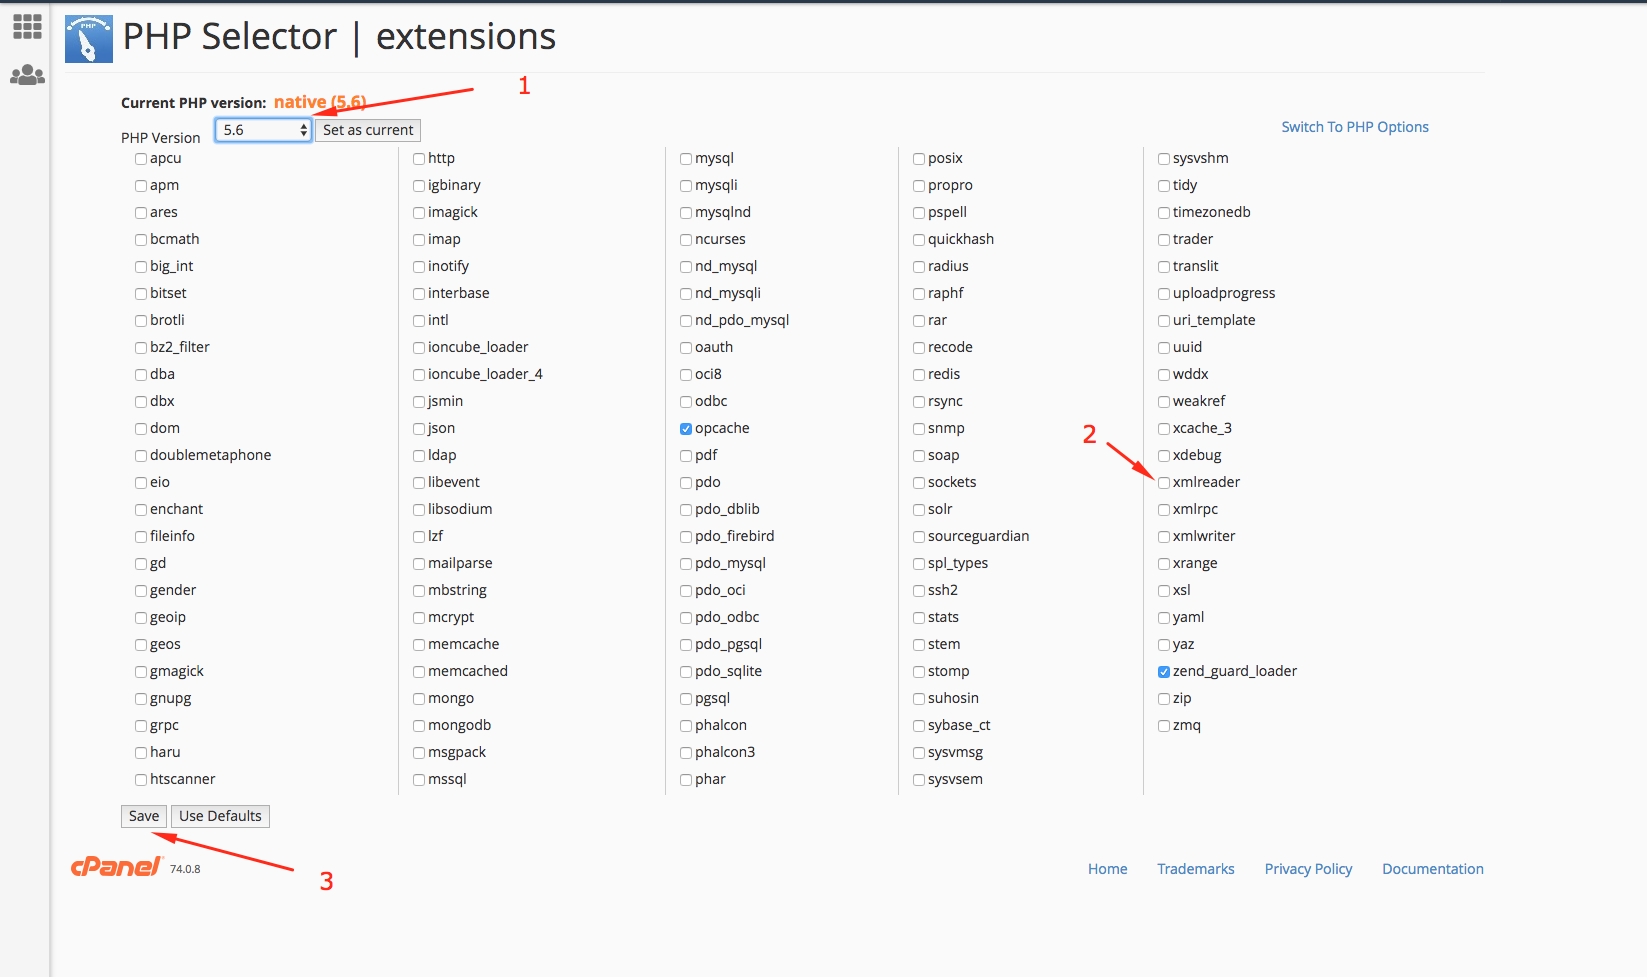
How to choose PHP version and enable PHP extension
Step 1: Go to cPanel find Select PHP version
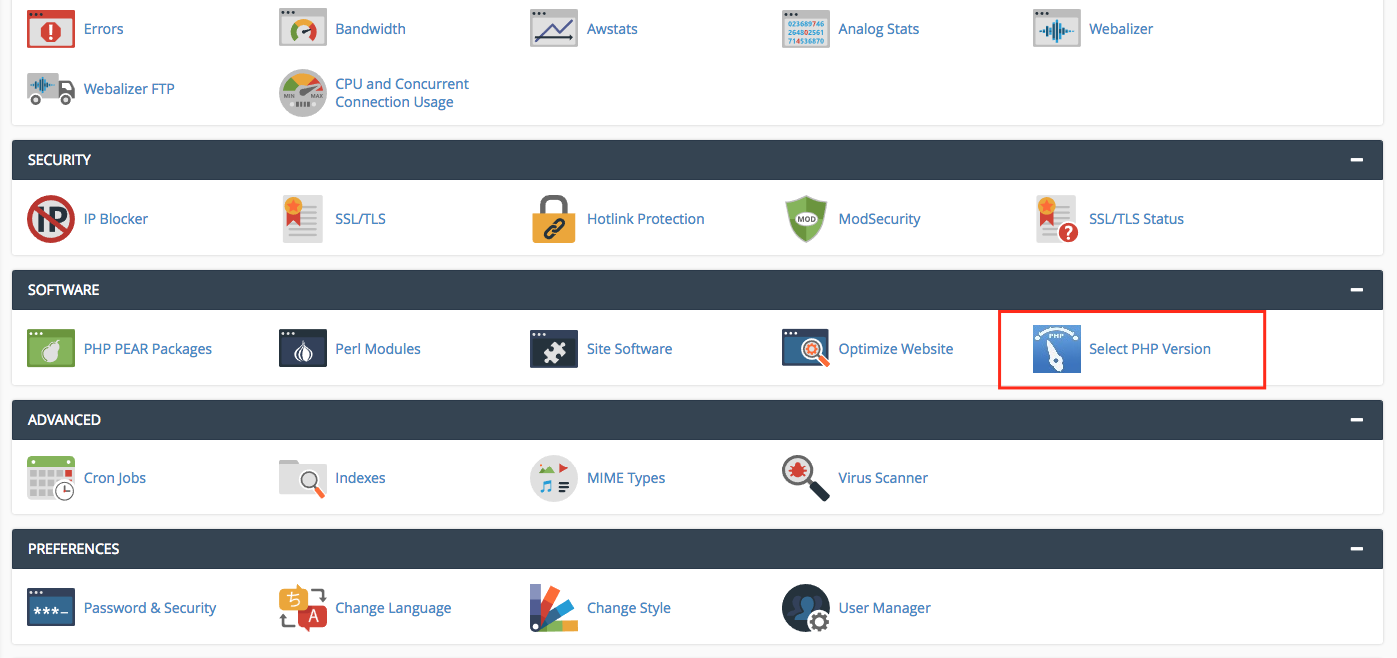
Step 2: Choose version 5.6 and enable XML reader extension
Step 3: Save the file
Last updated