Maloch - Multipurpose WooCommerce Theme
DemoGet Support
  • Getting Started
    • Welcome to Maloch
    • Theme requirements
    • WordPress knowledge base
  • Support
    • My Purchase code
    • How to get support
  • Installation
    • How to install demo
    • Common Installation Issues
  • Update
    • Before Updating
    • Update Theme
    • Optimize theme
  • Build Your Site
    • WordPress configuration
    • Theme Options
    • Build with Elementor
      • Header Site Part
      • Footer Site Part
      • Single Post Site Part
      • Single Page Site Part
      • Archive Site Part
      • Search Results Site Part
      • Error 404 Site Part
      • Single Product Site Part
      • Product Archives Site Part
      • Popups
      • Maintenance mode
  • WooCommerce Features
    • Sale countdown timer
    • Color Swatches
    • WooCommerce Builder
    • Freeshipping Bar
  • Menu
    • How to create menu
    • How to create Mega menu
  • FAQs
    • Things you should know about theme updating
    • How to get Instagram Access Token
    • How To Change WooCommerce Product Image Size
    • Create Header Sticky
    • Create Header Transparency
Powered by GitBook
On this page
  1. Menu

How to create menu

PreviousFreeshipping BarNextHow to create Mega menu

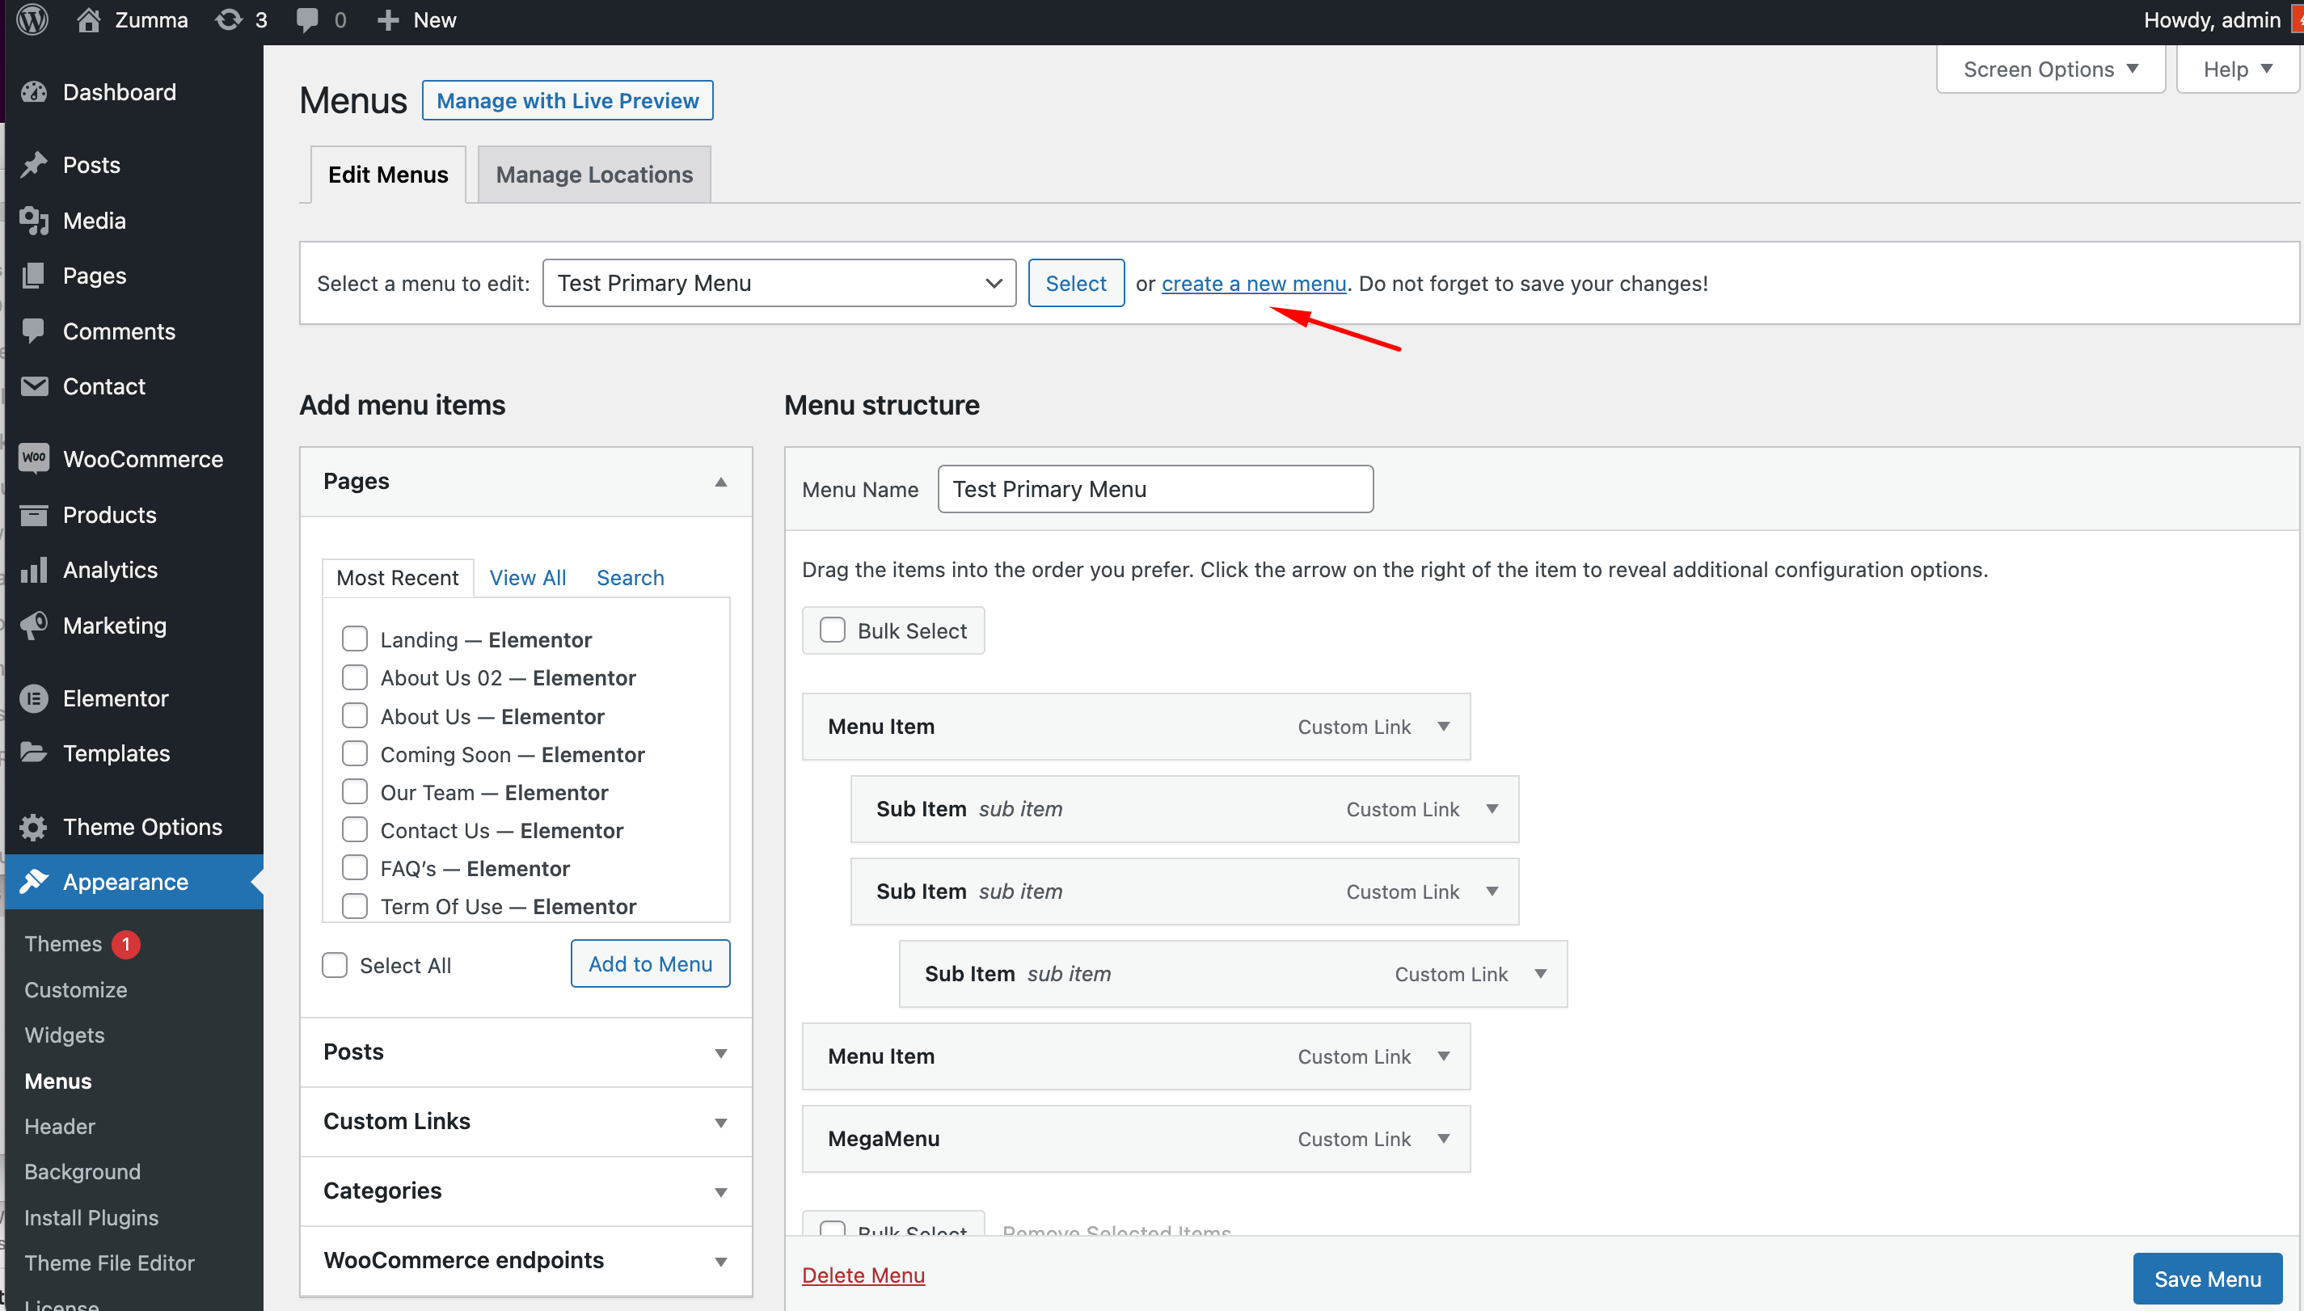
Step 1: Navigate to Apperance > Menus in your admin sidebar and click Create a new menu option.
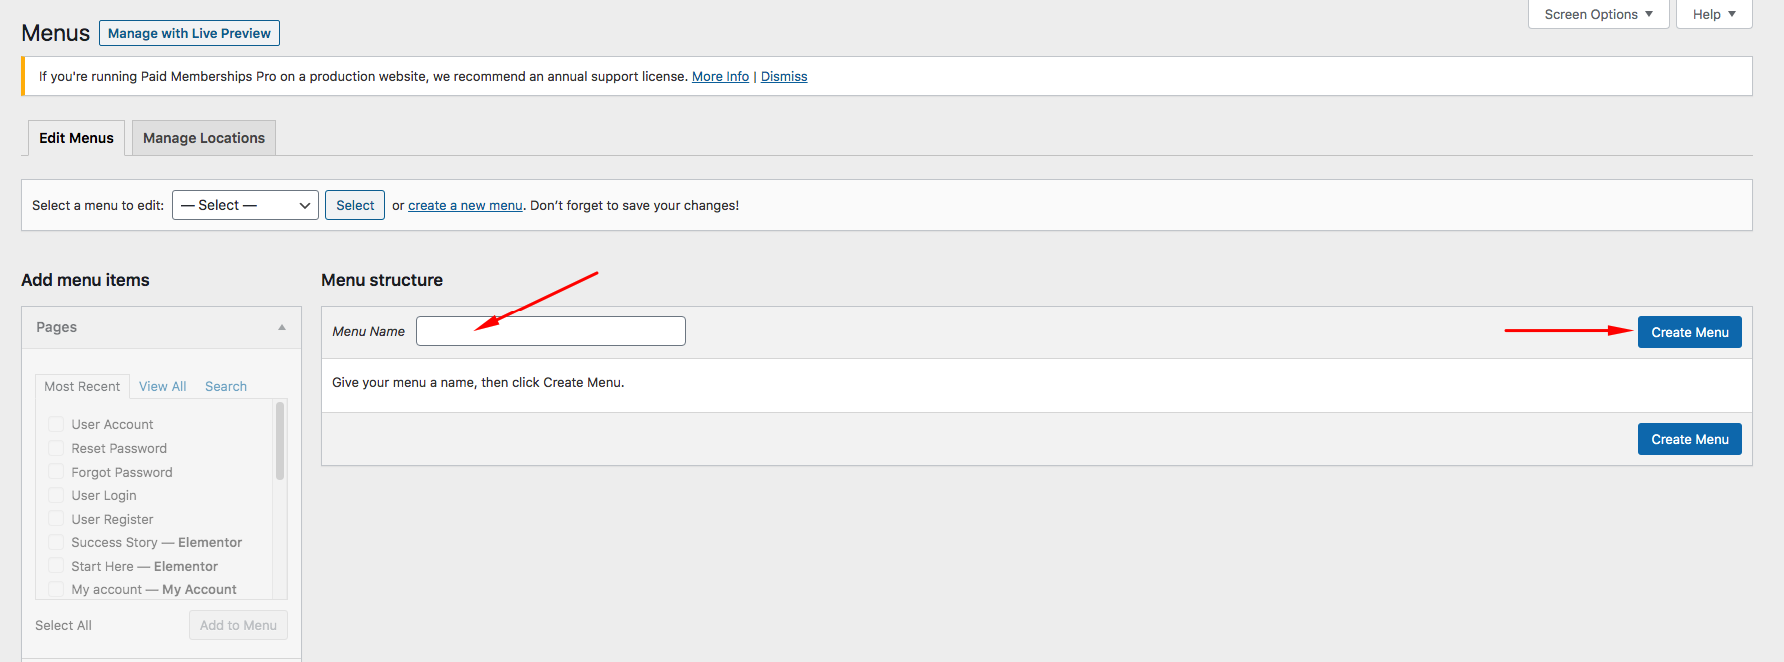
Step 2: Give your menu a name, then hit Create Menu.
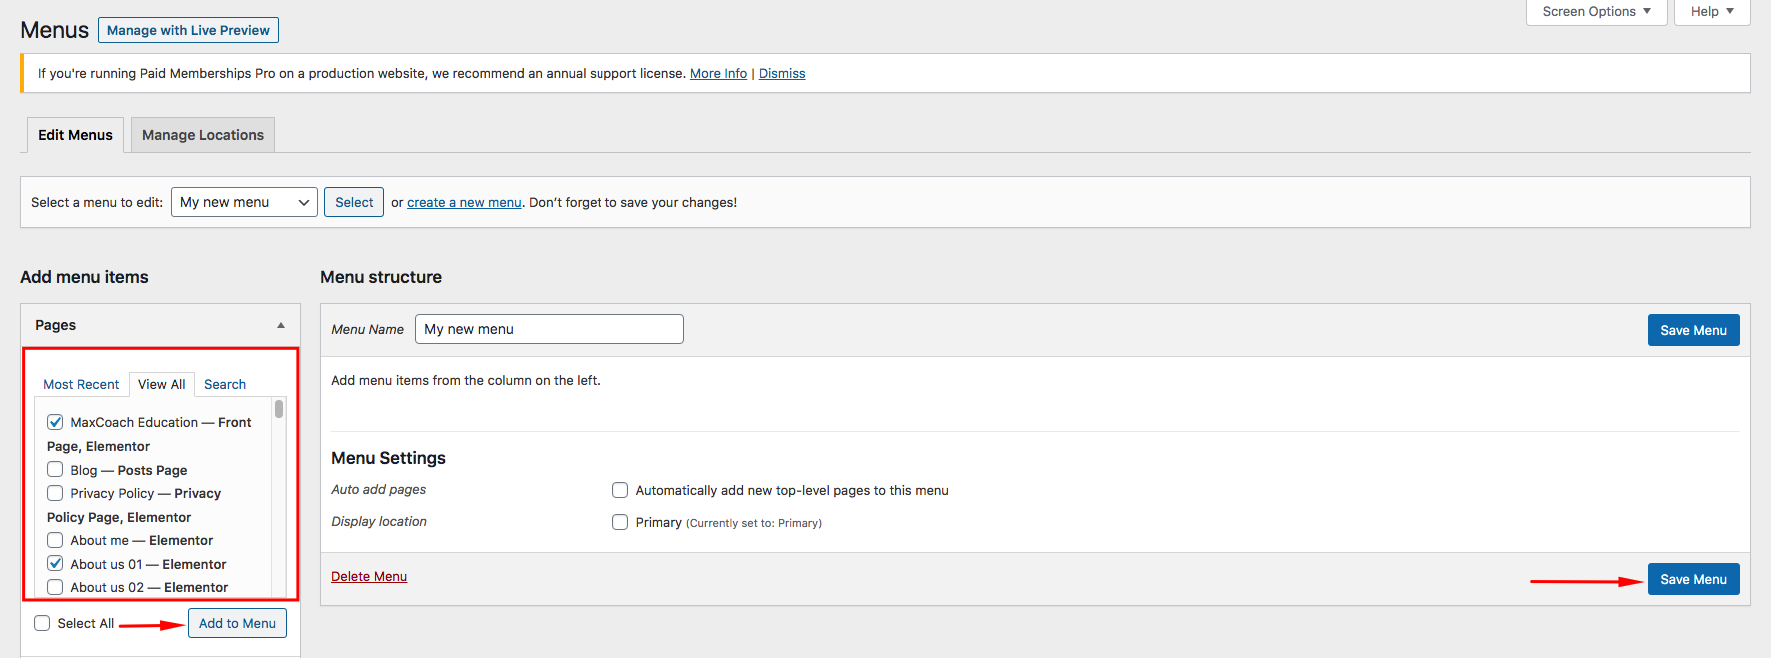
Step 3: Choose menu items you want to add from the left and hit Add to Menu.

Then hit Save Menu
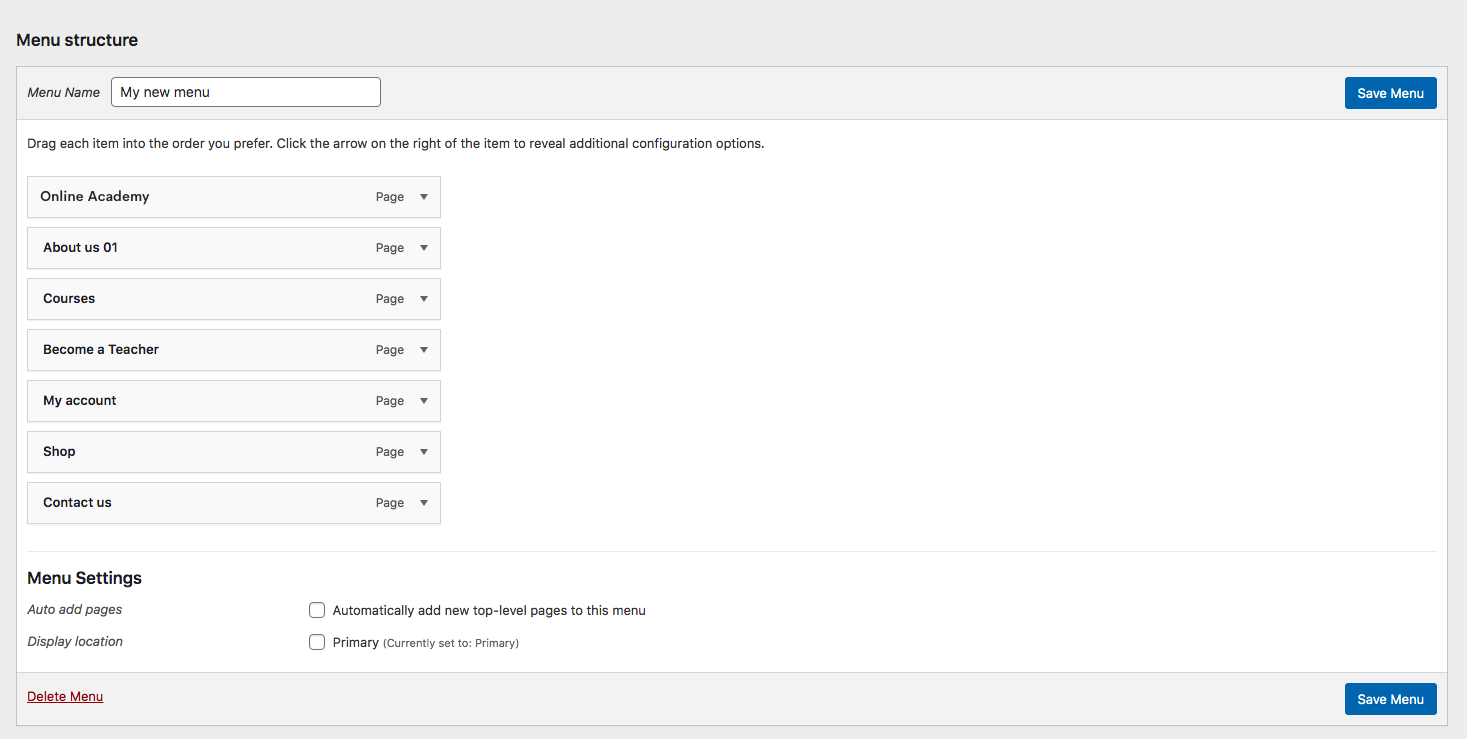
Your new menu has been created:
How to edit menu

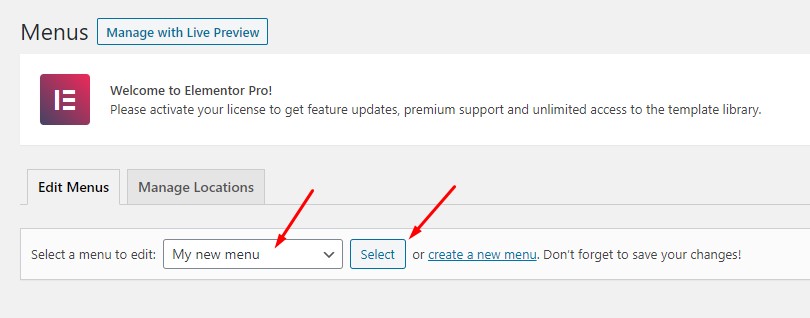
Step 1: Go to Appearance > Menus on admin sidebar, select a menu to edit.
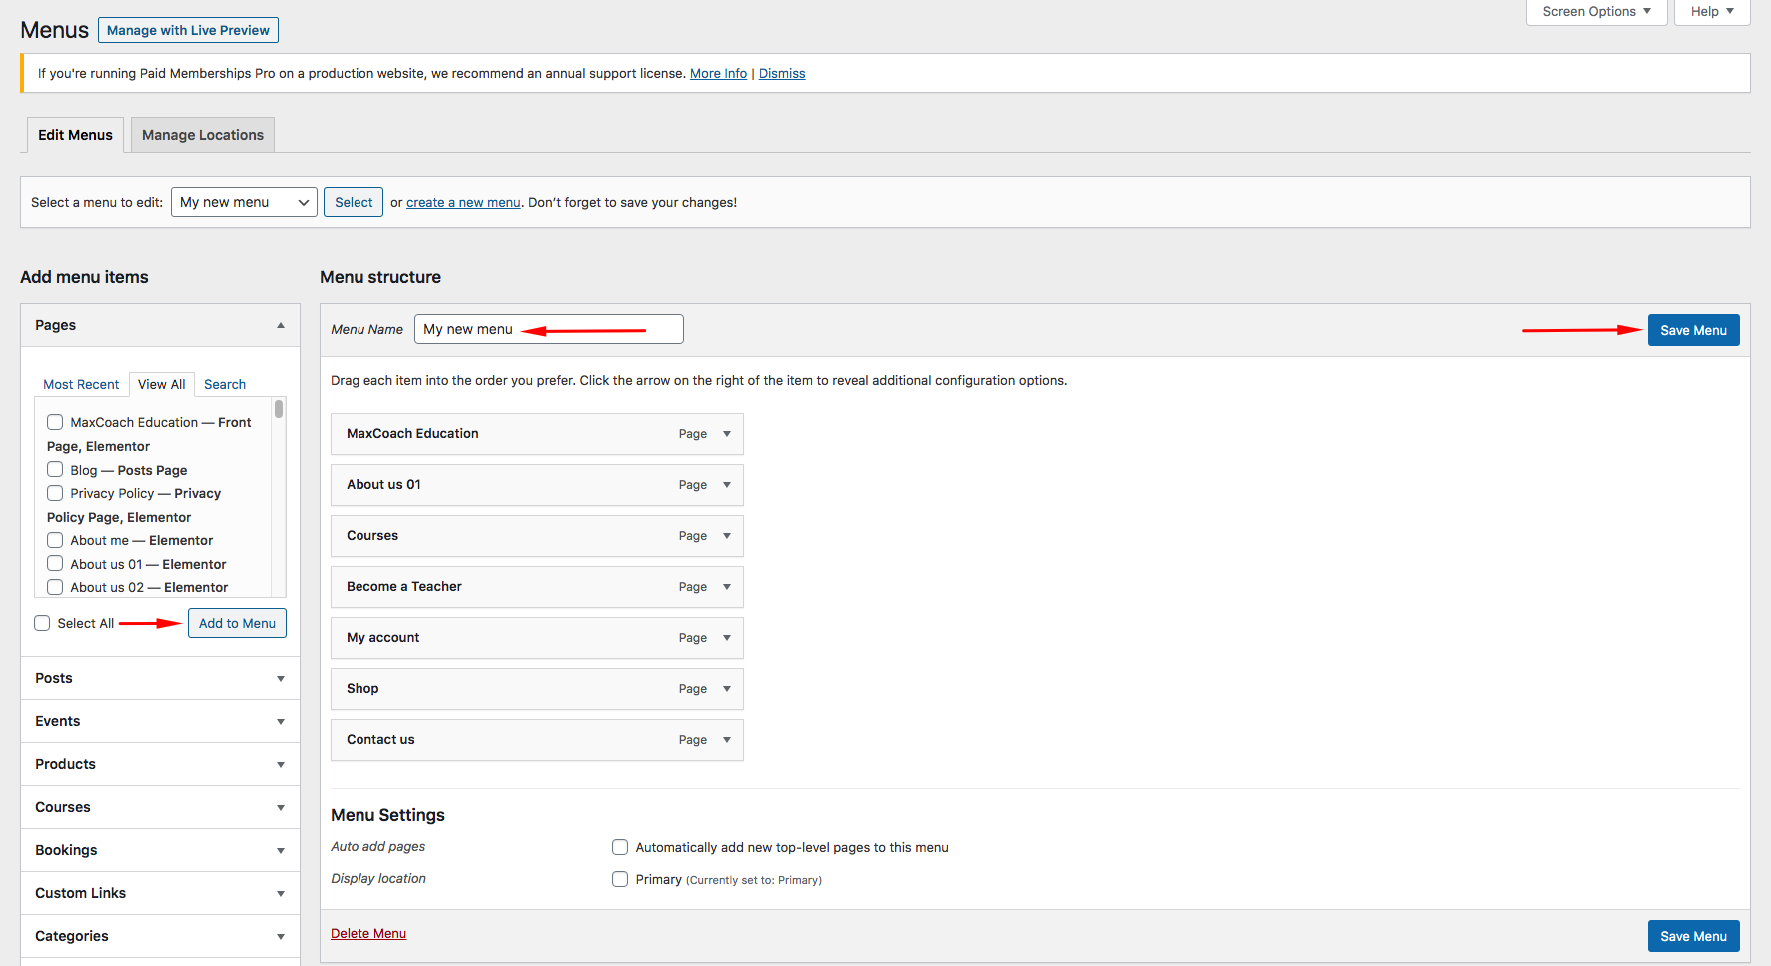
Step 2: Rename menu name as you wish. If you want to add more menu items, choose them from the left and hit Add to menu.
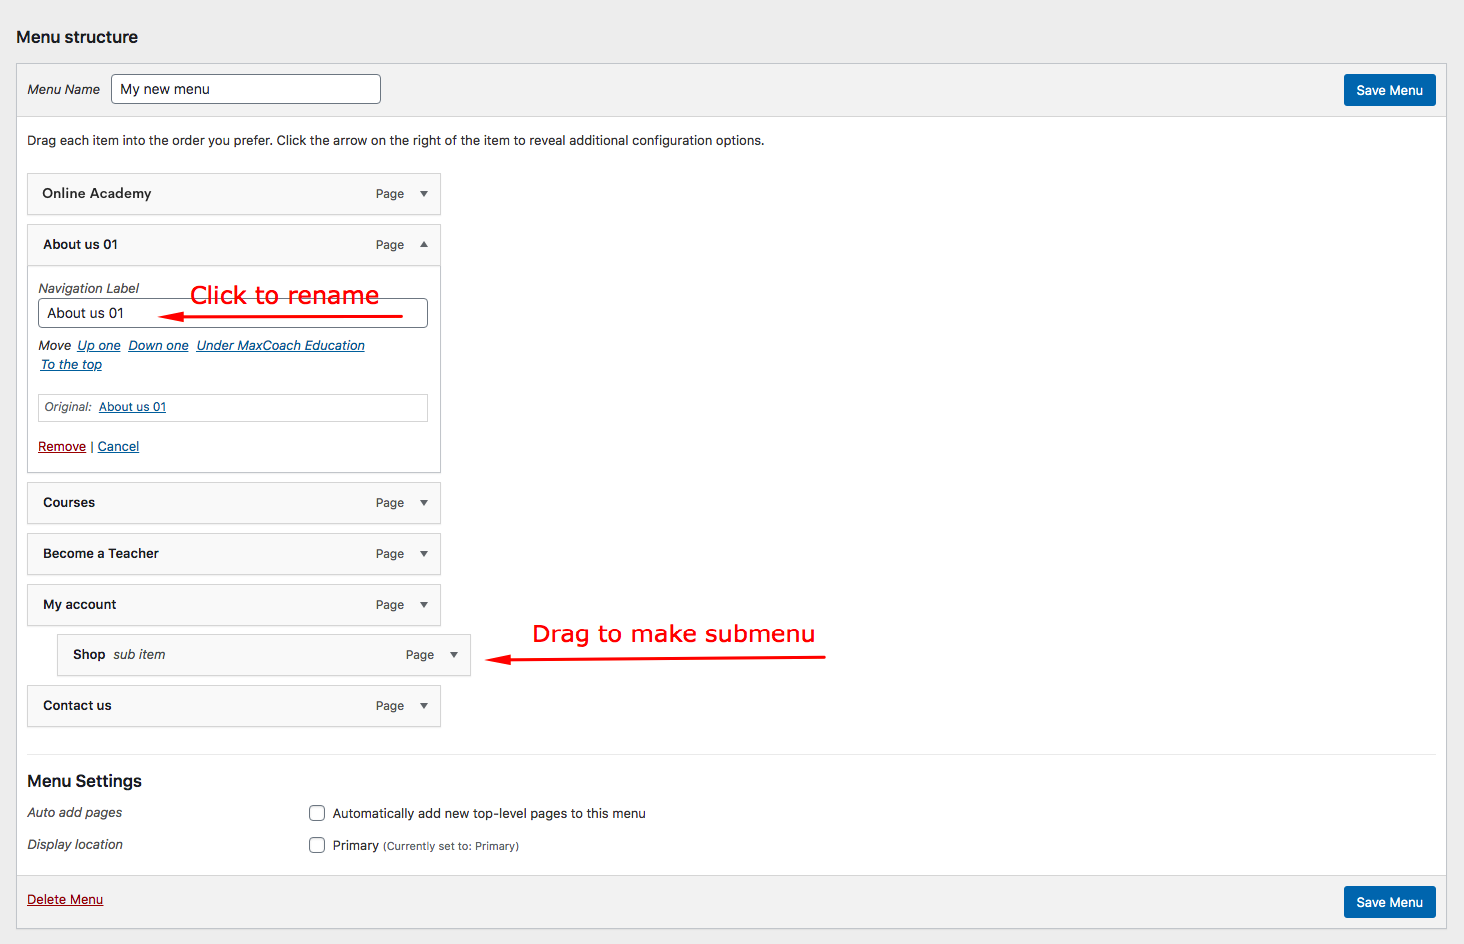
With each menu item, you can rename or drag to make it sub-menu.
Remember to hit Save Menu when you finish editing.